
~Imagined Worlds Project (Car Modeling and Texturing)~
- Archie
- Nov 11, 2019
- 2 min read

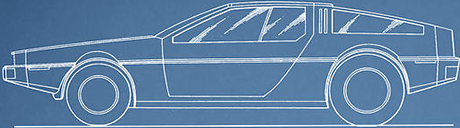
In order to make sure this was going to work we of course needed some sort of vehicle. I did some research and a pretty staple choice for this theme was a Delorean DMC-12, but ours would be lower poly to both save space and keep the theme of simplicity consisted throughout.

I found a really good blueprint consisting of all the perspectives I'd need to model the vehicle. In Photoshop I cropped these individually and precisely so that they'd fit nicely together with minimal editing needed in Maya. I did a similar thing last year however with the X-Wing project so I was confident it'd be doable.


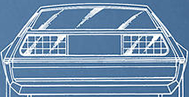
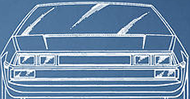
Now they were cut I imported them all into Maya as image planes. It was important to import them all in their correct sides so that it would be facing the wrong way round or something along the lines of that.

I started by using the blueprints to help me get some kind of form started with the top half of the car with the help of adding edge loops around the vehicle. So far it was going pretty well except for having to restart a few times due to crashing but I saved often.

Once I had the top half it was really simple to start on the bottom half and get a basic shell going but I still had to do a little more.

Once I had finalized the basic shell I had used booleans to create accurately sized holes for the wheels to go in, which I created using basic booleans and some beveling. I then went through the long but not too difficult process of cutting and sewing in areas to set up for and then go through with UVing the different sides so that texturing would be easy enough. Note that for the textures I'd be using the same master material as the building to make the car glow in the white areas with my colour of choice.

Finally to finish up I gave the top and parts coming down from it a little more shaping to make it look more like a car so it was ready to work with the UVs inside Photoshop. All in all it might not be perfectly accurate to my reference but it still definitely fits the role I needed. Next I had to generate UV snapshots of the UVs so they could actually go into Photoshop to be textured over. Here is an example of the lot and then the wheels and car individually for reference.


The texturing process was really simple and basically consisted of making any area I'd want to have colour white and leaving the rest dark. I used shift and the paintbrush tool for the car. I'll include the textures with and without the surrounding UVs.


Next the final step to have the car textured within our Unreal scene was to apply the textures to the master material and apply the correct settings. All in all it was pretty successful with no real problems to have to deal with.


Comments