
~3D Tools - Creative and Technical 3D Modelling (Lamp Project - introduction to NURBS)~
- Archie
- Dec 7, 2018
- 3 min read

Updated: Feb 1, 2019
The lamp project introduced me to a new way to create objects in Maya.
NURBS (Non-uniform rational basis spline), uses curves and lines in order to create certain objects that would have been more difficult if using regular polygons.

For this project, I started with finding an image of a lamp, I looked for something that looked symmetrical because I would later need to revolve the curved line 360 degrees.
I loaded the image into Maya as an image plane and selected the Bezier Curve Tool, using this I drew the right half of the brown stand using the tool.

Using the Revolve Tool, I turned the previously 2D line into a 3D object.


Once I had done this, it was a black object. To fix this I had to go to the 'Surfaces' tab, go to the bottom and select Reverse Direction to make it look how a 3D model would.
I did the same process with the lamp shade.


After the shade and stand were modeled, I had to convert the NURBS into Polygons. To do this I had to go to the 'Modify' tab, go down to convert, click the square next to 'NURBS to Polygons' (I need to change settings), and then change the type to quads and the tessellation method to count (The number you assign count to is the number of polygons the selected model will have).

I chose to have 600 polygons for both the shade and the stand, although if I had been assigned a certain polygon budget (An example of a time when this would happen would be when developing less detailed assets like background areas), I would have to put more consideration into how many Polygons I assign. For the mean time however it doesn't matter and I was aiming for a smooth model.
The next step was to create a power cable which would lead to a plug and socket.


The process of creating the plug socket involved extruding faces to create the pin holes where the plug would get electricity from and moving lines out to create the two switches.
The last thing to model was the power cable, which involved NURBS.


The first step of creating the power cable was to give it a plug, I used a basic prism shape and beveled it.
Next I used the EP Curve Tool in the 'Curves / Surfaces' because the line I'd have to make didn't have corners as sharp as the lamp stand did. I drew a line going from the side of the bottom of the stand to the bottom of the plug.
I created a basic cylinder and aligned it with where the line started, selected all the front faces of the cylinder and the line, then Ctrl+e to extrude the cylinder along the path of the line.
The only problem with that was that I had no divisions, I pushed the number of divisions up to 200 and then it could properly extrude around the line.
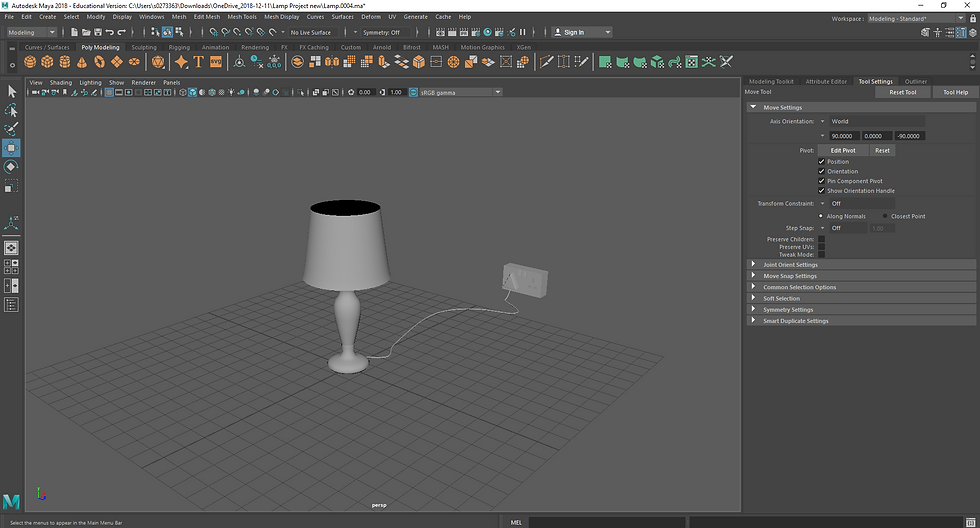
In order to ensure I could texture each part of the model individually, I had to assign each section a material. To ensure I knew which was which during substance painter, I gave each a name which corresponds to what they actually are. I changed each section to a contrasting colour to tell them apart.

Now I was ready to texture the lamp in Substance Painter, I exported everything as a .fbx file and moved over to Substance Painter.
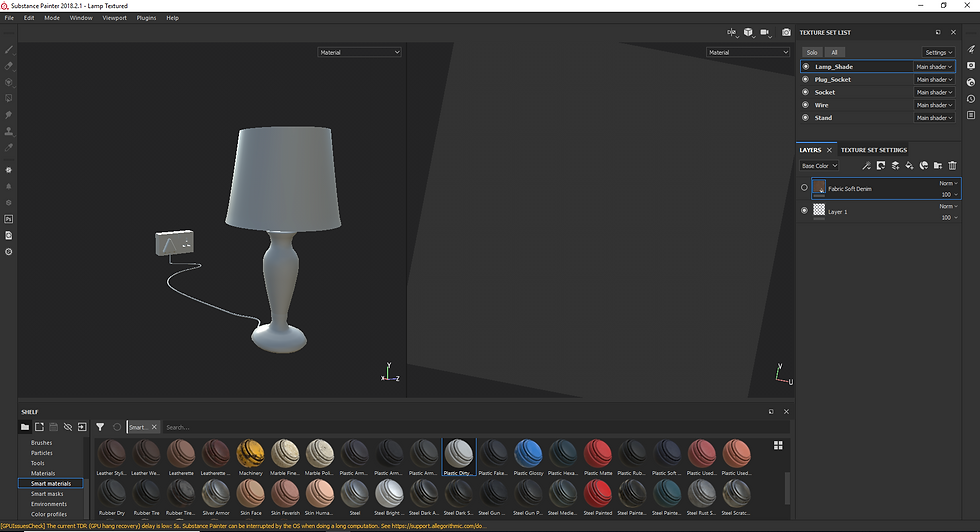
After loading the lamp into Substance Painter, I looked through each of the materials and assigned ones I saw fit to their corresponding positions.

Here I went for a rustic style wooden lamp with a rough fabric lampshade.
Overall this project was simple to get a grips of due to a familiar understanding of the NURBS tools right off the bat. In future projects, adding NURBS to existing knowledge in regular polygon modelling should allow for the creation of many more models.


Comments